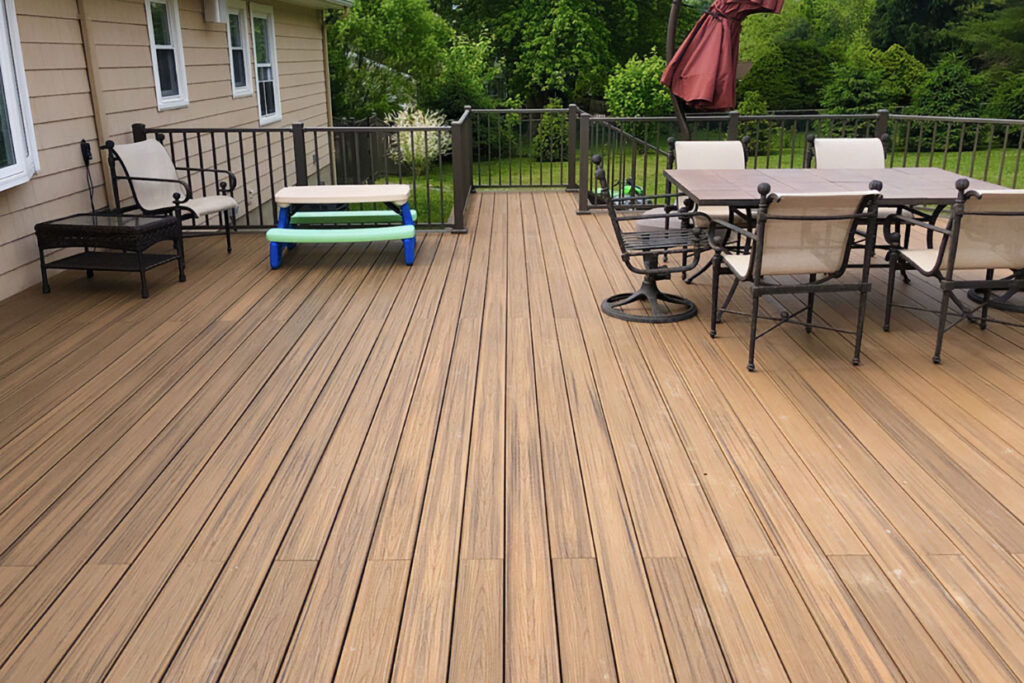
Composite decking has become a popular choice for homeowners looking to enhance their outdoor living spaces with a modern, durable, and low-maintenance option. Unlike traditional wood, composite decking resists rot, fading, splintering, and insect damage. Installing it yourself can save a significant amount of money and give you the satisfaction of a well-done project. However, it’s essential to approach the job correctly to ensure a long-lasting and professional-looking result. This guide covers everything you need to know about DIY composite decking installation, from preparation to the final touches.
Why Choose Composite Decking?
Before diving into the installation process, it’s important to understand why so many homeowners are turning to composite materials. Composite decking is made from a blend of recycled wood fibers and plastics, resulting in a product that mimics the look of wood but without its drawbacks. It requires minimal maintenance, offers superior durability, and comes in a wide variety of colors and textures.
Unlike timber, composite decking won’t warp or crack, and it’s much more resistant to environmental damage. These features make it especially suitable for regions with harsh weather conditions. Additionally, most brands offer extended warranties, further underlining its value and reliability.
Tools and Materials You’ll Need
Proper preparation is crucial when planning your composite decking installation. Here’s a checklist of tools and materials you’ll likely need:
- Composite decking boards
- Starter clips and fasteners
- Joists and ledger boards (pressure-treated timber or steel)
- Tape measure
- Level
- Power drill
- Circular saw or miter saw
- Spacers
- Safety gear (gloves, goggles, ear protection)
Some composite decking brands may require proprietary clips or fasteners, so always check the manufacturer’s guidelines before purchasing materials.
Planning and Design
A well-thought-out design will make the installation smoother and ensure a functional and visually appealing deck. Consider the size, shape, and orientation of your deck. Will it be attached to your house or freestanding? Do you want built-in seating or planters?
Use graph paper or design software to sketch out your layout, including joist spacing, which typically ranges from 12 to 16 inches on center for composite decking. Confirm local building codes and secure any necessary permits before starting construction.
Site Preparation
Clear the area where the deck will be installed. Remove grass, rocks, or debris, and level the ground if necessary. If building over an existing concrete pad or patio, inspect it for cracks or unevenness. For raised decks, dig holes and pour concrete footings according to code.
Once the area is prepared, install weed barrier fabric to prevent vegetation growth under the deck, which can affect drainage and airflow.
Framing the Structure
The support frame is the foundation of your deck, and it must be strong and properly aligned. Use pressure-treated timber or metal joists to create the substructure. Start by attaching the ledger board to your home, ensuring it’s level and securely anchored.
Next, install the beams and joists, maintaining even spacing throughout. Make sure the frame has a slight slope (about 1/8 inch per foot) away from your home to promote water drainage. Double-check for level and squareness before moving on to the decking boards.
Installing Composite Decking Boards
Begin composite decking installation by laying the starter row using starter clips. These clips ensure the first board is fixed firmly and straight. Once the first board is in place, use hidden fasteners or screws as recommended by the manufacturer to attach each subsequent board.
Allow proper spacing between boards to accommodate expansion and contraction due to temperature changes. Most manufacturers provide guidelines for spacing. Use spacers to maintain consistency and achieve a neat appearance.
Cut boards to length using a circular saw with a fine-tooth blade. Always wear safety gear when cutting and drilling. If your design includes curves or intricate angles, you may need a jigsaw or specialized tools.
Decking Patterns and Layout Tips
Straight, parallel lines are the most common decking pattern and easiest for beginners. However, you can get creative with diagonal patterns, herringbone designs, or picture-frame borders for added visual interest.
Before fastening, lay out a few rows dry to see how the pattern looks and ensure correct alignment. Pay attention to color variations in the boards and arrange them for a natural, blended appearance.
Finishing Touches
After the decking boards are secured, install fascia boards around the perimeter to hide the subframe and give your deck a finished look. Some homeowners also opt to add skirting or lattice panels below the deck for a more polished appearance and to prevent animals from nesting underneath.
If you plan to include railings, benches, or lighting, follow the manufacturer’s guidelines for installation. Many composite decking systems have matching accessories to complete the look.
Maintenance and Care
One of the biggest advantages of composite decking is its low maintenance requirements. Unlike wood, it doesn’t need staining, sealing, or sanding. Regular cleaning with mild soap and water will keep it looking great. Avoid using harsh chemicals or pressure washers that could damage the surface.
It’s also a good idea to periodically check fasteners and make sure drainage systems remain clear. Promptly remove debris like leaves and branches to prevent mold and mildew buildup.
Common Mistakes to Avoid
Even experienced DIYers can make mistakes. Here are some pitfalls to watch out for during composite decking installation:
- Ignoring manufacturer instructions: Different brands may have specific requirements for spacing, fasteners, and framing.
- Poor ventilation under the deck: Proper airflow is necessary to prevent moisture buildup and extend the life of your structure.
- Incorrect joist spacing: Composite decking may sag if not adequately supported. Stick to recommended spacing guidelines.
- Over-tightening fasteners: This can damage the boards or affect their ability to expand and contract.
- Skipping slope for drainage: Water pooling on your deck can lead to long-term damage.
Final Thoughts
DIY composite decking installation can be a highly rewarding project that adds value and beauty to your home. With the right tools, careful planning, and attention to detail, you can achieve professional-level results even as a novice. Composite decking not only enhances your outdoor space but also offers long-lasting durability with minimal upkeep.